
Guides
How to Wire a Book Nook With Battery LED Lights and Hide the Cords
Wire book nook LED lights with a battery pack, hide the cord under trim, and test every joint with a multimeter before the back panel goes on.
What to take away
- Settle the switch position first, because it decides where the wire run ends.
- A holder with three AA cells outlasts a coin cell in a nook that stays lit.
- Run the wire along the inside back corner and cover it with trim.
- Check polarity and voltage with a multimeter.
What you need before starting
A book nook is a dark box with almost no room to work inside. Every wire you bury is a wire you must dig out later, so the parts list matters more than the technique.
- Battery holder for three or four AA cells, with an inline switch
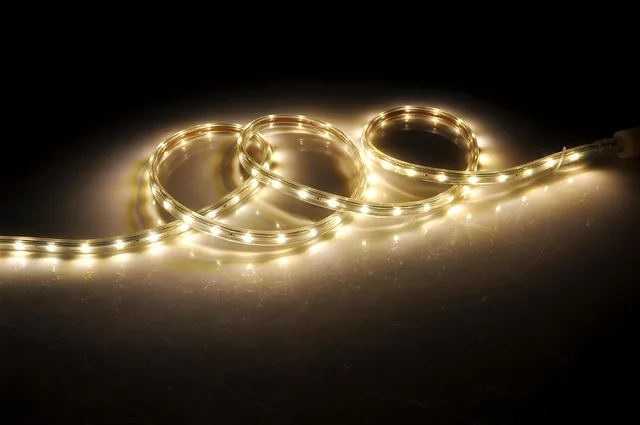
- LED strip or two to three UL-listed puck lights matched to that voltage
- 22 to 26 AWG stranded wire on a small spool
- Wire strippers, heat-shrink tubing and a heat source
- A cheap multimeter for a polarity check
Holders sold at US craft chains such as Michaels and Hobby Lobby are built for AA or AAA cells, and a three-cell pack sits near 4.5 volts. Most 5-volt strips will light on that, slightly dimmer.
If you are starting from nothing, eight tools worth buying first covers the minimum set for a bench like this.
The sequence
Work from the inside of the box outward, and leave the pack on the bench until the last step.
Wiring sequence, inside out
- Dry-fit frame and mark back panel
- Choose switch side facing open end
- Measure to farthest light, add four inches
- Cut wire, strip 5 mm, twist strands
- Join wires, slide heat-shrink, shrink until grips
- Power on bench, confirm every light
Match the wire gauge to the run length before you cut.
| Run length | Gauge to use | What it means |
|---|---|---|
| Under 12 inches | 26 AWG | Enough for one puck light |
| 12 to 30 inches | 24 AWG | Matches most strip leads |
| Over 30 inches | 22 AWG | Run a second feed, not heavier wire |
- Dry-fit the empty nook. Mark where each light, the battery pack, and the switch will sit. Put the switch on the side that faces you when the nook is on the shelf. You should reach it without pulling the nook out.
- Cut each wire run with 2 to 3 inches of slack. Strip 3/16 to 1/4 inch (about 5 to 6 mm) of insulation from each end.
- Tin each stripped end with a soldering iron. Slide a 1/4 inch length of heat-shrink tubing over one lead before you join.
- Twist the tinned leads together, solder the joint, and let it cool.
- Slide the heat-shrink over the bare joint, centered on the solder. Shrink it with the iron or a heat gun until it grips.
- Mount the battery pack with double-sided foam tape or a screw-on clip. Drill a switch hole just larger than the switch body. Deburr the hole and feed the switch leads through.
- Check polarity and voltage at the pack and at the farthest light with a multimeter.
- Test the full run.
- Run the wire along the inside back corner and cover it with trim.
- Close the nook.
Hiding the run
The inside back corner is the best channel in a book nook. It hides from the front, it swallows a wire no thicker than a fingernail, and a strip of trim covers it. Full-size cable management follows the same logic at a larger scale.
A wire that crosses the floor of the scene will show in every photograph. Keep runs on a wall or in a corner, and add a little slack at each light so a piece can be lifted without tugging a joint.
Leftover spools, heat-shrink offcuts and trim strips come back in later builds, so materials used for diorama lighting deserve their own labeled box.
Where judgement replaces the recipe
Three choices have no fixed answer: how many lights, how warm the color, and where the switch sits.
Two pucks read as one dim room. Three read as a lit interior with a clear source. Warm white near 2700 K suits wood shelves and old paper.
Light-emitting diodes at this scale draw milliamps, so heat is not the problem. Voltage drop and mechanical strain are.
How to tell it is right
Turn off the room lights and stand a foot back. The scene should be lit and the back wall almost dark. A bright spot on the rear panel means a light sits too close to the wall.
A nook that lights on the bench and dies in the shelf was pinched during the dry fit, not during the wiring.
Measure at the pack and again at the farthest light. A 4.5-volt pack should still read near 4.3 volts at the end of the run. Much below that means the run is too long for the gauge you chose.
To build that eye before committing a finished nook, a weekend of lighting drills in a test box costs almost nothing.
Run a fingertip along the inside corner. Any bump under the trim is a pinched wire.
Fixing it when it is not
The common failure is a strip that dims toward the far end. The fix has a name: the second feed. Run a parallel pair from the pack to the last light, leave the original run in place, and join both at the terminals.
A flickering light is usually a cold joint. Reflow it with fresh solder and hold the iron a beat longer.
Power the repaired run for ten minutes before the back panel goes on, and check that the heat-shrink still grips.
Repairs go faster when parts are chosen for how easily they come apart, which is the argument behind picking repair materials.