Industry
Part of Diorama lighting how it works: lumens, lux and color temperature
What diorama lighting turns out to demand: what to know first
The parts of scene lighting that only show up after a few builds: light as an unavoidable trade, how museums changed their approach, and why the market keeps moving.
What to take away
- Plan for roughly 50 to 150 lux at the model, 2700 K to 3000 K color for interiors, and two to four hours of running time a day.
- Treat light as a dose. Fifty lux for four hours daily is about 73,000 lux-hours a year, and the yearly total drives fading harder than the peak does.
- Buy constant-voltage 12 V or 24 V strip rated CRI 90 or higher, then dim it with pulse-width modulation.
- Solder and heat-shrink every joint, leave a service loop, and keep the emitter reachable without dismantling the build.
The three numbers and two habits
Everything a small scene asks for comes down to five things. Three are numbers: illuminance at the model, color temperature, hours per year. Two are habits: dimming the source, keeping the emitter replaceable.
Conservation practice treats this as a budget rather than a limit. The Getty Conservation Institute's museum lighting research project, which ran from 2002 to 2015, frames light as a dose a lit object cannot escape and cannot fully control. Its guidance compares LEDs with traditional sources on efficacy, lifespan, lumen maintenance, color rendering and cost.
LED vs Traditional Lighting
LED
- Efficacy
- higher
- Lifespan
- longer
- Lumen maintenance
- better
- Color rendering
- varies
- Cost/payback
- favorable
Traditional
- Efficacy
- lower
- Lifespan
- shorter
- Lumen maintenance
- worse
- Color rendering
- varies
- Cost/payback
- less favorable
A scene lit hard once a month can be safer than one lit gently every night. Only the yearly total accumulates. If lux is a new unit to you, how diorama lighting works converts lumens, lux and color temperature into figures you can check with a phone sensor.
Choosing the source
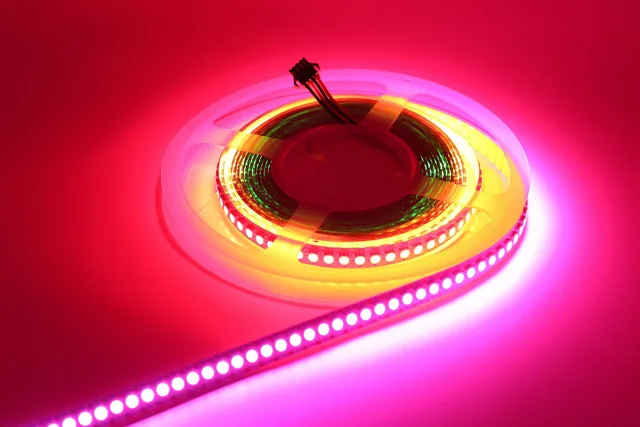
Light-emitting diodes drop roughly 2 to 3.2 volts each, depending on color, which is why a strip runs from a low-voltage DC supply rather than mains. Wikipedia's article on LEDs covers that side if you need to size a driver.
Buy constant-voltage strip, not constant-current modules. Density matters more than length. A typical 12 W per meter strip cut to 300 mm draws about 0.3 A at 12 V, which suits a small scene.
Dimming is where cheap kits fall down. Pulse-width modulation holds color steady as output drops, while lowering voltage alone shifts warm white toward pink or green. Two small emitters at half power also beat one bright emitter, because shadows read as depth.
For how gear compares on price, heat and connectors, see four points on diorama lighting gear.
Exposure and color: working numbers
| What you are setting | Typical range | Note |
|---|---|---|
| Illuminance at the model | 50 to 150 lux | Measured at the front face |
| Interior color temperature | 2700 K to 3000 K | Room boxes and lamps |
| Daylight color temperature | 5000 K to 6500 K | Exteriors, overcast scenes |
| Color rendering | CRI 90 or higher | Below 80, wood and paper turn grey |
| Daily running time | 2 to 4 hours | The variable you control |
Run the arithmetic once and the habit follows. Fifty lux, four hours a day, 365 days, is about 73,000 lux-hours a year. Halve the hours and you halve the dose. A switch is the cheapest conservation tool you own.
Example: a 1:12 shelf scene
1:12 shelf scene
- Supplya 12 V DC driver with at least 30 percent headroom above the strip's rated draw.
- Strip2700 K, CRI 90 or higher, 60 LEDs per meter, cut to about 300 mm.
- Dimminga PWM dimmer on the low side, set at 40 percent to start.
- Placement50 to 75 mm above the ceiling plane, aimed at the back wall, never at the viewer.
- Testrun four hours, then feel the adhesive and the driver. Warm is fine, hot is not.
- Serviceterminate the strip at a plug rather than a soldered joint, and leave a loop behind the back panel.
That sequence is also a drill. Builds that isolate one variable at a time are how these numbers become instinct, and six builds that each teach one lighting skill sets them out by difficulty.
Hiding the cord without hiding a fault
Most first builds look wrong because the source is visible, not because the light is wrong. Cable management fixes that.
OSHA's wiring methods standard bars flexible cords from replacing the fixed wiring of a structure. A battery pack is fine. Splicing a cord into a wall circuit to hide it is not.
Hiding the cord
- Heat-shrink every splice. No twisted and taped joints.
- Terminate strips at connectors so emitters can be swapped.
- Leave a 50 to 100 mm service loop behind the back panel.
- Route the cord along the base, under a removable trim strip.
- Keep the driver outside the scene or in a ventilated pocket.
Heat, adhesive and what fails first
Cheap strip fails at the adhesive long before the diode does. Warm air has nowhere to go in a closed box, and the backing lifts within months on a vertical face. Use a clip or a bead of neutral-cure silicone, not pressure alone.
Battery contacts corrode next. Use a holder you can open without unsoldering. Supplies and spare strip keep better in a labelled box, and how to store materials used for diorama lighting covers temperature and moisture.
Canadian builders ordering strip or kits from United States sellers should add courier duty and tax to the budget before ordering.